15 Tips for Expert Grilling

Without further ado, let’s fire up the grill!

Marinades Are As Easy As 1, 2, 3
For many, marinating beef can be a point of stress. What do I use? How long do I let it sit? We totally get it, and have asked those questions ourselves. Thankfully, it doesn’t have to be difficult.
1- Repeat after us: a third, a third, a third. That is, 1/3 olive oil, 1/3 acidic juice and 1/3 soy sauce or another fermented liquid to start as your marinade base. You’re then free to get creative — throw in a little garlic, sriracha, cilantro or lime to add additional flavor and kick if you so desire.

2- When it comes to timing, tender cuts of beef such as Strip Steak, Sirloin and Flat Iron only require 15 minutes to two hours of marinating. Tougher cuts like Flank steak and Skirt steak should marinate for a minimum of six hours and a maximum of 24 hours — any longer than that and you risk breaking down muscle fiber, which can create a ‘mushy’ texture (yuck).
Preparing the Grill
Preparing the grill seems like a simple-enough task, but in reality, there are many small details that can make a huge difference in both taste and safety. Do you accept the challenge? Let us guide you:
Turning on the grill:
3- Step one when turning on a gas grill is making sure you’ve got a full propane tank underneath the grill, and that the tank is connected to the grill’s hose. We know, we know – this seems self-explanatory, but trust us, there’s nothing worse than preparing tasty beef for grilling only to discover you’re out of gas when stomachs are growling at dinner time!

4- Before you turn on the gas, make sure that all grill knobs are turned off. The last thing you want to do is be caught off guard by a sudden flair-up when you’re not expecting it (ouch!).
5- Once you’ve checked, twist the propane tank’s knob so that gas is flowing, turn one grill knob on, and light it. When heat gets going, turn on the remaining grill knobs, and pat yourself on the back because you’ve just successfully turned on a gas grill.
If you’re a charcoal griller, don’t worry, we haven’t forgotten you! For charcoal grills, laying briquettes down properly is critical to successfully lighting and heating your grill.
6- Practice the grid method when doing so — that is, lay your briquettes in a grid pattern instead of the traditional pyramid in order to evenly distribute heat. Determine how much charcoal to use by how much meat you plan on consuming (for example, a 5×5 or 6×6 grid is perfect for two steaks). If you’re grilling more meat for something like a backyard barbecue, bear in mind that adding an additional layer of briquettes will account for about 20-30 minutes of grill time.

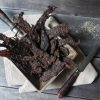
How many layers of briquette grids would you need to cook this many steaks?
Cleaning the Grill:

Once your grill is on, make sure to clean it! This step is often overlooked, but it’s necessary to get the best flavor possible while grilling.
7- Doing so is easy: simply turn your gas grill to high heat so that any leftover food stuck on the grates from previous grill adventures turns to ash, then brush off the remaining debris with a wire brush.
8- If you don’t have a wire brush handy (or simply want an extra level of cleanliness), use a yellow onion to wipe off the gas grill’s surface. Yes, you heard that right — an onion. This will pick up excess debris as well as provide a nice non-stick surface for grilling.
9- Onion method not for you? Dip a paper towel into a high-smoke point oil (canola, grape-seed, etc.) and wipe it along the grate to get that same non-stick surface. You can also use grilling spray for the gas grill, but be sure to turn the grill off before doing so! This will prevent unnecessary and dangerous flare-ups (as we said before — ouch).
10- The same steps apply for charcoal grilling, only when using oil spray, you’ll want to pick up the grate with tongs and spray away from the grill. SAFETY FIRST, always! For cleaning, we also recommend placing a piece of aluminum foil over the charcoal grate while the grill gets hot. This will help retain heat, making it easier to clean with a brush after removal!
Temperature is key
Okay, so the grill is clean. Now it’s time to heat it up to that PERFECT grilling temperature — but where does that fall? 400 degrees is, for the most part, considered ideal for both gas and charcoal grilling. But here are a few things to consider:
11- Many gas grills include built-in temperature gauges to help find that perfect temp. However, this does not always reflect the accurate temperature of the grilling surface.
12- Instead, we recommend using the 4-4-4 rule. Hold four of your fingers four inches from the grill, and try to leave them there for four seconds. If you can hold them there for longer than that, your grill needs to heat more. If it’s too hot to make it a full four seconds, your grill needs to cool down. When you’ve found that sweet spot, you’re ready for steaks!
The Meat Thermometer: A Grill Master’s Best Friend

Determining meat doneness is one of the most important (and sometimes most difficult) components of grilling. And, contrary to popular belief, “guess-timating” is not the way to do so! Which is why we’re such a big fan of meat thermometers. If you don’t have one, GET ONE! Seriously, sprint to the store and purchase one NOW, then read up our meat thermometer guidelines before hitting the grill. In the meantime, here are a few beginner tips to follow:
13- To determine doneness, pick the steak off the grill with tongs (NOT a fork! This will release flavorful juices that help make your meat oh so yummy) and insert a meat thermometer into its side. The number on this thermometer is your golden ticket to grilled steak perfection.
14- Medium rare steaks are done at 145 degrees. However, keep in mind that steaks continue to cook for about 10 minutes after they’re taken off the grill. What does this mean for your meat thermometer? Take the steak off the grill around 135 degrees, and let it sit for 10 minutes until it hits 145. The same applies if you like your steak rare (140 degrees), medium (160 degrees) or well done (170 degrees). Be sure to account for carryover cooking!
15- Last but not least, enjoy your steak — I’m willing to bet money that it’s going to be delicious!

Phew! That was a LOT of information, but we hope you’re ready to hit the grill (AND make your neighbors jealous with the delicious grilling smells that are sure to be coming from your backyard). Did we miss any of your favorite grilling tips? Share them with us in the comment section below!